Homebrewing 101
I have been asked numerous times to write an article on the making of Beer. With that in mind, I will attempt to document my rewarding and fun hobby.
Beer has been brewed nearly as long as there has been civilization. The earliest recipe dates from
Since Pilsner style beer accounts for most sales in the
That is GOOD beer contains only those four things. Most mass produced beer in the US, that is Coors, Bud and Miller families typically contain such things as Corn, Rice, Sugars, Stabilizers, Conditioners and who knows what else? Bud is “Beechwood Aged”, but do you know what that actually means? The “Beechwood Aging” aging consists of the brewer throwing in a hunk of wood in the bottom of the 30,000 gallon tank. Now I have never been a stickler for tradition but a hunk of wood?Let’s discuss the ingredients in a REAL beer.
- Malt - is Barley that has been dried and the outer hull removed. It is milled, much like Coffee, and is to beer what grapes are to wine.
- Hops - are a bittering agent. It gives Beer the bite that makes you come back for more. A member of the Cannabis family, the flower is the seasonings of beer
- Yeast - is a single celled organism that consumes sugars and leaves in its wake, Carbon Dioxide and, thankfully, Alcohol.
- Water - the higher quality the better. 95% of Beer is water; its quality cannot be stressed enough.
There are a few other odds and ends that are optional, but if properly prepared, these four ingredients will get you some decent brew. In the picture below, all of the essentials for a quality brew are shown. Going clockwise starting from the bottom Left;

Hops - Saaz in this case. Many of the Pilsner styles use this type exclusively, as will we. This is loose hops, with unmolested Buds. I prefer them to the pelletized types used by many Brewers.
Thermometer – I much prefer the digital type, I’m a High Tech kind of guy after all. But the resolution available on most analogs is poor at best and Mercury thermometers give me the willies, this is Beer after all. It will be used several times in the process, choose a good one.
Reading Material – You have to assume the next 5 hours are essentially wasted; you might as well be too. Crack a beer in celebration and find a way to kill some time. You will need it. Brewing is 1 hours work in 5 hours time.
Project for Wife – now don’t get me wrong, I love my wife. But there are times when a guy likes to be a guy. This is one of those times.
18 Lbs Milled 2 Row Malt – I bought it at the brew supply house and milled it myself. As I said before, Malt is to Beer what Grapes are to Wine. The 18 Lbs, with the very efficient extraction method we will be using will give us plenty of sugars for our yeast to eat and supply a rich body for the beer.
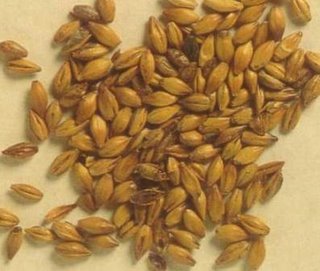
1 Lb German Pilsner Malt, 1 Lb
Yeast – We are using good Czech lager yeast. Yeah yeah, I know I said we were making Pilsner; deal with it. Pilsners need to be refrigerated for long periods and they take forever to make. I like to drink, so we will use lager yeast and be drinking beer in 2 weeks, not staring at a refrigerator for 3 months.
And that’s pretty much it. There is the matter of Pots, Burners, Utensils, and some of the goodies that make your life easier, but I am going to assume you have or can get the rest.
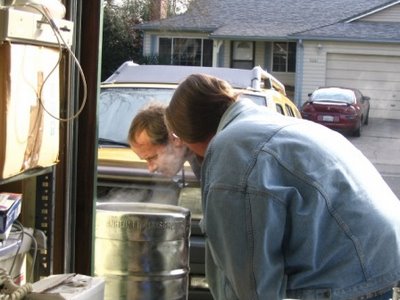
I always try to make brewing a social occasion so I invited Dave over to be my intrepid assistant for the day. Would you not agree he looks like a man who knows his beer?

The Brew Begins
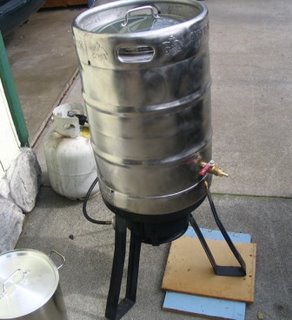
As I said in the beginning, brewing takes time. There are some shortcuts and #1 is; start your water boiling first. I use pots that I made from old 15 gallon kegs. 10 gallons take awhile to boil. Start early. Occasional stirring will speed up the process if quickly re-covered. If you are blessed with excellent City Water, you need only run the hose for a few minutes to assure yourself of clean tasting water and fill your pot, otherwise, good spring water can be purchased at any grocery store. Put it on your burner, set the temperature to Nuclear and start getting the rest of your supplies together. Check your yeast. The ingredients may need to be at room temperature for several hours like ours are here. It would be an unpleasant surprise to find out too late that you need to pitch your yeast in a medium first or some other speed bump that ruins your batch. I *cough cough* speak from experience here.
A word about Sanitation.
I have a saying when I brew.
Cleanliness is next to Drunkenness.
Always sterilize your implements, tools and especially anything that will touch the beer after it has boiled. If in doubt, throw it in the sterilizer. I use an iodine based one available from any kitchen supply house.
Temperature, Taste and Grain
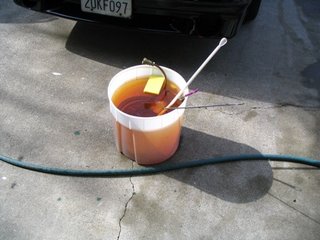
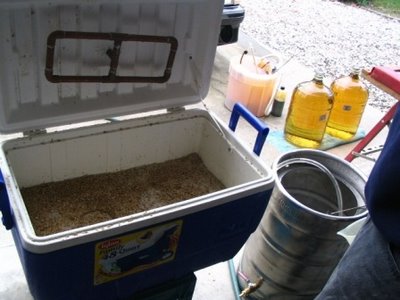
By now, you are nearing the end of your first beer and the water is nearing a boil. It is time to prepare for the next step; mashing. Mashing is “brewing” the malt, like coffee, for an extended period of time at a controlled temperature. It is essential that you keep your temperature at or near the optimal point, typically 153 to 159 degrees. In order to maintain this temperature for the longest period, I use a converted Ice Chest that was purpose built for mashing grains.
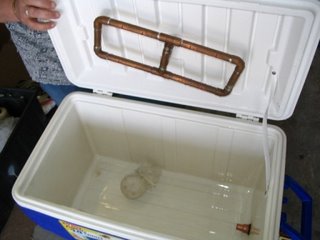
The less bleary eyed of you might have noticed that the white object in the bottom is in fact, a whiffle ball wrapped in cheese cloth. I managed to, ahem; misplace the bottom piece that is similar to the one in the lid that acts as a filter. Since necessity is the mother of invention, and I promising myself I couldn’t have a second beer until we were mashing in, I devised this quick fix that ended up being if anything, better than the actual one. I attached it to the outlet pipe with zip ties and it worked like a charm. The upper piece is a soldered copper pipe assembly that contains dozens of tiny cuts in the pipe that causes the water coming down to rain on the grains. It helps in a later stage as it keeps the amount of solids down which helps clarity.
My intrepid assistant Dave mixed the Crystal Malt in as I poured the larger bag of grain taking care to more or less equally distribute the two kinds. It filled the ice chest about 2/3 up so we had plenty of room. We are ready to mash.
We both got another beer and checked the water temp, it was just at the start of the boil, about 180 degrees, and I judged it perfect. I took a large measuring cup and poured it into a funnel built in to the top of the ice chest “striking” the grains with the hot water. For this we are just interested in getting in volume so I poured it in quickly. Once the water level reached the top of the grain bed, I measured the temperature and found it nearly perfect. I added more hot water then a bit of cold to get the temperature at 158 at the core of the grain bed and the water slightly covering the grains.
Fill your kettle back up, put the lid on and the heat up, grab a fresh beer and relax for a few; mashing is in progress.
Check your temperature from time to time but resist the urge to open the lid. The temperature will drop, and you may need to add hot water, but unless the temperature has fallen below 153, leave it alone
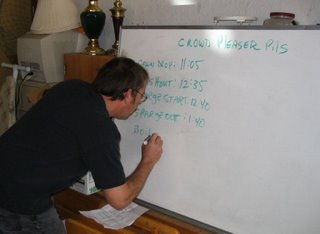
In order to keep tack of the brew and to make sure things happen on schedule, I like to use a white board. I write down the time I strike the mash and write down my times all the way to the boil. My Brother, the Mechanical Engineer encouraged me to try it and I swear by it now. It eliminates those awkward moments as you think back in a beer induced fog to remember what time you dropped the hops or started the mash.
Looks impressive as hell too.
Sparging
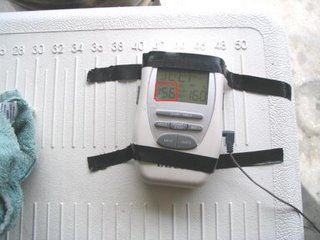
You gotta like a good ice chest.
I put an empty kettle under the Mashtun and guided a hose into the opening
Our pot should now be at a boil. In another pot, I mix some of that boiling water and cold water to get 3 or 4 gallons of 175 degree water. I pour some of that water into the mashtuns funnel with my measuring cup.
 I open the valve on the mashtun, being careful not to lose any of our liquor as it pours out of the hose into the kettle. I refill the mashtun with the 170 degree water raising the temperature of the grains again. We are trying to raise the temperature without disturbing the grainbed in order to leave as many of the dissolved solids behind. With the use of the ice chest, our efficiency is outstanding. A few minutes of adding hot water at the same time as we let it out will soon have our hose running clear showing we have extracted all of the available sugars and we can stop rinsing the grain.
 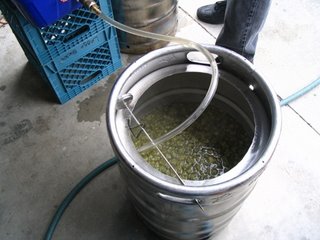 Our grains have given their all. They taste like Cream O Wheat now. No detectable sugars. This is going into the compost bin. Note the carboys full of sanitizer on the right.
The Boil Begins
With the assistance of my intrepid assistant Dave, we lifted the hot liquor onto the burner, turned it up high and added boiling water from the other pot to bring the volume in our kettle to about 11 ½ gallons. I left the lid on for a few but watched it like a hawk. Boil overs are bad, and I wanted to avoid one at all costs. Once the temperature started getting close to a boil I removed the lid. After 25 minutes or so, we were at a rolling boil; I turned the fire down slightly, and noted the time.
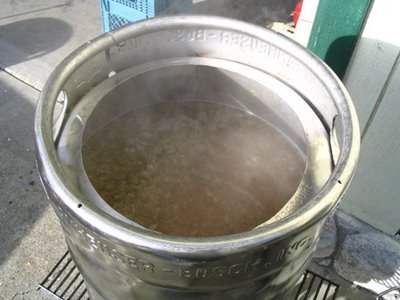
Grab another beer and relax, your next step isn’t for at least another hour. See what the wife is doing, check on the kids (if any) and relax for a few. After the strenuous activity so far, you may want to even consider two beers while waiting. You might want to use this time to clean up your mashtun, be careful however, the spent grains are hot. No sense in over exerting yourself however, you might want to play it safe and see what’s on TV instead.
Dropping the Hops
After 60 minutes at full boil, it is time to add the first of the hops. Read the instructions for your recipe, many require a shorter boil before the first drop. I measured out 4 ounces of the Saaz hops and dropped them into the pot. I added some Irish Moss (yes moss) to the pot at this time as well. The Irish Moss makes the solids coagulate, which will be a big help for us later on.

The wort needs to boil for another 30 minutes, during which time; you don’t have a lot to do. My suggestion; have another beer.
You can get a good idea of what the beer will taste like by now, give it a good sniff.
The final Drop
The wort has now boiled for a full hour; your last hop drop is at hand
I measure out ½ ounce of the hops and drop them in

The boil ends ten minutes after the last hop drop. I quickly note the time and start to get ready to cool down the pot. I use an immersion chiller, which is nothing more than a piece of copper pipe wound into a coil with hose fittings on each end. Once a garden hose is attached and the water running, it removes heat amazingly fast. I had presoaked it in the sanitizer and dropped it in the pot for a few minutes for good measure.
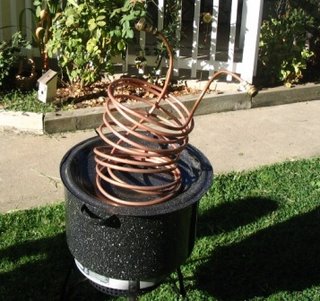
Ten Minutes after the last hop drop and the fire has been turned off, I attached the garden hose to the chiller and turned on the hose. The temperature starts to drop immediately. With an occasional stir, the temperature will drop to less than 100° in 15 minutes or so.
I ran the hose and monitored the water coming out. Once it started to get just warm rather than the near boiling, I use the thermometer (sterilized) to confirm the temp was less than 100 degrees. Using my largest spoon, I swirled the liquid making the most active whirlpool I could and put the lid on the kettle. The beer is ready to go in to the carboys now, once the sterilizer is emptied.
Everything that touches the beer from this point on needs to be sterilized; including you.
Remember what I said earlier?
Cleanliness is next to Drunkenness.
This is where it comes into play.
About this time, the new owner of a 56 Buick I sold a few months back stopped by so I took 5 minutes to check out his ride.

Once Betty the Buick left I poured out the sanitizer that the carboys had been soaking in, attached a short hose to the kettle valve and drained the now cool liquid into the large glass vessels.
Pitching the Yeast
Following the directions on the Yeast, I confirmed the temperature had dropped to a little over 85; I shook the yeast well and poured it into my carboys. I capped the carboys and shook them vigorously per the directions on the yeast bottle.
Brewing is complete; it is all up to Mother Nature now.
Troubles in
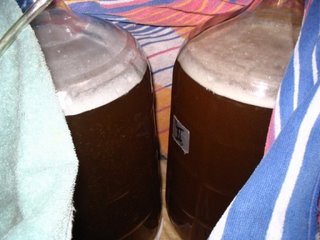
I put the carboys in the front room and wrapped them with towels to block out the light and insulate them but I was stunned to discover the next morning that fermentation had stopped. It was just too cold. Never fear, a quick shake and a space heater quickly got us up to our 75 degree minimum that the yeast required. I put a heating pad under them set on low and checked them throughout the day.
Within 20 minutes, fermentation had begun again in earnest and we were back on schedule.

Note the hoses running from the tops of the carboys to the water filled bottle; it is a rudimentary valve that allows the carbon dioxide to move out freely without the possibility of an overflow.
I wrapped up the carboys and left them alone, checking progress once a day.
Three Days Later
We are looking good; fermentation was robust and has now peaked. I will check back in a few days.

One week Later
Our sugars have given their all; fermentation has stopped as indicated by the lack of bubbles from our hoses and the thick layer of dead yeast in the carboys. I moved them carefully into the garage where it was quite cold to completely stop fermentation and let the beer settle.
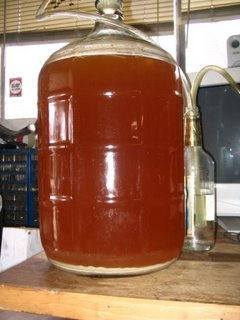 Once again, I wrapped the carboys in towels and left them alone for a few days.
Racking out
After years of bottling, I bit the bullet and bought kegs. I found a great local guy on the Internet who sells them for less than 20 bucks apiece. With the time, effort and storage problems found in bottles, I was happy to bid them farewell.
Since our brew has settled nicely in the 45 degree weather, we are ready to rack out.
I put sanitizer into my kegs along with some hose and other stuff I might need in siphoning out the beer.
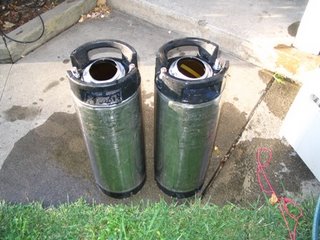

Siphon into your sanitized Kegs.
I start a siphon with the sterilized hoses and carefully drop it lower and lower into the beer, trying to get as much of the boozy goodness while avoiding the layer of dead yeast on the bottom. The yeast is not really a problem, it does not affect flavor but it is visually unappealing so we will avoid it if possible.
Note how I use a long spoon to guide the hose down, it is 2/3 into the carboy at this point.
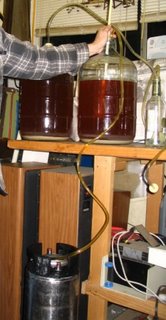 A mere 15 minutes later, we are done. I hook up the CO2 and give the kegs a shake to make sure they are well sealed and it is into the kegerator for these guys.
These dead soldiers did their job well. I will clean them tomorrow in daylight.

Note the 1” layer of dead yeast on the bottom.
Carbonation
I was interested in getting these kegs carbonated quickly so I chose to force carbonate them. I set the pressure on the CO2 to 20 Lbs pressure and shook them several times a day. Naturally, I had to check daily for “quality”. It tasted better by the day and I was looking forward to Fridays unveiling.
The Pour
It seemed like the day would never arrive but, 2 weeks after we started; it’s Beer Time.
We had a little gathering and I had my panel of judges give their opinions.
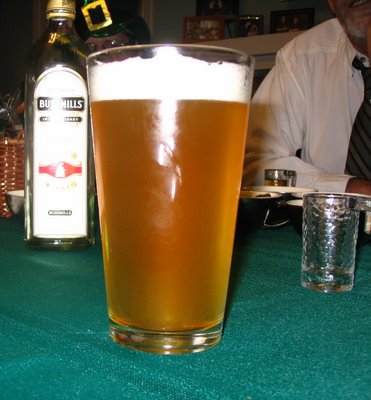
Intrepid Assistant Dave pronounced it “inspiring” and compared it to St. Pauli Girl.
Brother Tom couldn’t decide if it was St. Pauli Girl or Becks, but either way, he drank copious quantities making the determination.
Mrs. Knewshound declared it to be “a good summer beer” and “a beer for people who don’t drink homebrew”.
Perfect.
As for me.
They ALL taste good. This one is no doubt a keeper and I will brew it again for the 4th of July and other occasions where I brew not for myself, but for those who normally like Miller or some other MacroBrew. It is light and crisp, with a deep Saaz bite and a clean finish. It will be an excellent summer beer and I cannot recommend it highly enough. Mash here for the recipe if you would like to try it on your own and if you like I will send along the 150 word version of this article for those of you who enjoy brevity in place of wit as well as an Excel Spreadsheet with the layout for the white board for you to use on your own.
So for now, my brewing is done, I return my supplies back into their storage container and I look forward to 3 weeks time when I will again brew it up so that, when these kegs are empty, there will be a fresh batch to refill them.
I hope you enjoyed reading this article as much as I enjoyed writing it. I don’t often venture out of my usual commentary to write a fact based article like this but I have had a blast writing it. Many thanks to Quantim for his proofreading assistance and keeping me down to earth, my brother Tom for the tech support, Mrs. knewshound for being such a good sport and my able assistant Dave for his help.
Cheers,
hic
knewshound
Labels: knews

