Homebrewing 1A
I have received several requests for a column about Homebrewing, but at a beginner’s level. My previous column was for experienced brewers and not for the novice. If you have ever thought about brewing, you might be inspired to give it a shot. After all, it is inexpensive and you likely have most of the needed equipment around the house.
This is meant to be a quick introduction and not a complete guide to every facet of the hobby. For a in depth explanation, discussion and guide, please refer to John Palmers excellent on line book available at http://www.howtobrew.com/intro.html
This guide is meant for the novice looking for an easy to follow, low dollar investment that will still produce a decent brew. Long time brewers will no doubt feel I should have improved the brew with additional steps or equipment, I disagree. Much of a novices concern is in the initial cost to get involved, I believe a low buck, low tech solution is perfect for the aspiring homebrewer.
What you are making
Beer has been brewed nearly as long as there has been civilization. The earliest recipe dates from
Typically, homebrewed beer contains only a few ingredients.
- Malt - is Barley that has been dried and the outer hull removed. It is milled, much like Coffee, and is to beer what grapes are to wine.
- Hops - are a bittering agent. It gives Beer the bite that makes you come back for more. A member of the Cannabis family, the flower is the seasonings of beer.
- Yeast - is a single celled organism that consumes sugars and leaves in its wake, Carbon Dioxide and, thankfully, Alcohol.
- Water - the higher quality the better. 95% of Beer is water; its quality is key.

Brewing beer starts with steeping or “mashing” barley that has been “malted” or encouraged to start to sprout, then dried and milled roughly. The resulting “tea” of steeped grain is then boiled to release sugars and flavors. A popular shortcut is to purchase malt extract. This extract is essentially the same tea or liquor made in normal mashing, but boiled down and concentrated into a honey like liquid that can be the basis for some fine beer. It cuts down on time and trouble, both of which are key to an enjoyable homebrewing experience.
Getting startet
A trip to your local Home Brew Store should be your first stop. If you don’t have a local store, I highly recommend Northern Brewer and More Beer as good places to mail order from. Either way, feel free to ask questions. You will generally find most Homebrewers eager to help and can be a wealth of information.
Once there, you need to decide what you want to brew. The choices can be daunting. Shall I make a crisp Pilsner or a smooth Lager? Perhaps a hearty stout, or an ale perhaps? How about a fruit beer? Or a seasonal like Hefeweizen?
The choices are endless but I will make a few suggestions;
- Pilsners (Pilsner Urquell, Becks, St. Pauli Girl and *allegedly* Bud, Miller and Coors) are tough to make for beginners. They can be difficult to brew and are not very tasty without a lengthy cold rest. Save this one for your 6 month brew.
- Lagers (Sam Adams, Heinekin) have many of the same issues as Pilsners. Some varieties can be made at somewhat higher temperatures, but again, get some experience under your belt before trying these more unforgiving styles. Like Pilsners, they also require storage at low temperatures to be their best.
- Ales, Stouts, and flavored beers (Guiness,

I selected a Brown Ale kit, well, two actually since I am making a 10 gallon batch.

Mike rang up my purchase along with 12 pounds of Light Malt Extract. My bill for the 10 gallon batch was $42 bucks. Even the cheapest swill produced by the national mega-breweries is far more expensive.
Once home, I opened up the kit and beheld my booty. Your kit may of may not contain all of these ingredients.


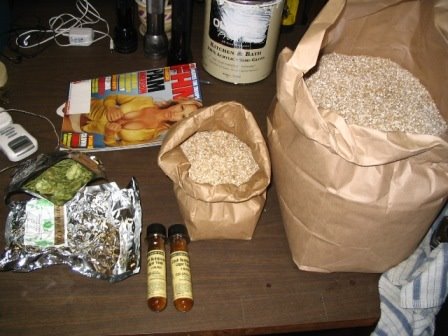
Steeping Grains and Liquid Malt Extract
Plus a whole bag of goodies

The ingredients in the bag were
- Hops, both boiling and aroma varieties.
- Yeast. I personally prefer liquid but oh well.
- Priming Sugar for bottling.
- Cheesecloth bag for steeping grains.
- Clarifiers for giving your brew that clean look.
- “Kettle sugars” to increase Alcohol and body
- Dextrin for mouth feel and body
That’s it for the software, now lets talk about hardware.
Equipment
In all my hobbies, few rival Homebrewing for the number of gadgets, goodies and oddball hardware that allege to make the brewing process easier and or quicker. Sometimes, that’s even true. That being said, brewing is as complicated as you wish to make it. I will endeavor to make this batch much the same way you will, avoiding the pitfalls of complication.
For hundreds of years, Brewers made do with little more than a big pot and a spoon. We will go a bit beyond that but will keep it simple. The first and most important piece of hardware is a B.A.G. or Big Ass Pot. For years I used this 7 gallon model my wife bought me for Christmas. This is the ideal size but any very large pot will do.

Plan on using the biggest pot you can possibly find. Stainless Steel or Enamel are preferred over Aluminum. Use what you feel is the best and biggest you can get. If you don’t have a big pot lying around, ask friends and family. Everyone has an Aunt who used to can vegetables. Let’s put her pot back to work!
Buy a fermenter.

- This is the single most expensive piece you need. Any supplier will have them for as little as $20 bucks. Spend the extra 3 dollars for the spigot in the bottom. You will never have to siphon your beer if you do. Along with a few other incidentals, you should be able to get started for well under 50 bucks. All of the hardware can be re-used for years to come.
- One indispensable piece is a bubbler or airlock, they come in many styles. Here are two common types.


Both are inexpensive and a must have item for a successful brew. Be sure you get the appropriately sized bung or stopper for your bubbler that matches your fermenter
- 6 Feet of 3/8" food grade plastic hose, available from most hardware stores.
Additionally some small items found around the house or from your supplier will be needed;
- Large Spoon, the longer the better
- Kitchen Thermometer, digital is quicker and more accurate
- Large Tea Kettle or 2 gallon pot for water
- Measuring Spoons
- Bottles, recycled from your normal beer consumption
- Packet of Sanitizer, available from your supplier.
Getting started
The liquid extract that came with our kit is great for body and a basic brew, but we are opting for some extra flavor by steeping the specialty grains that came in our kit.
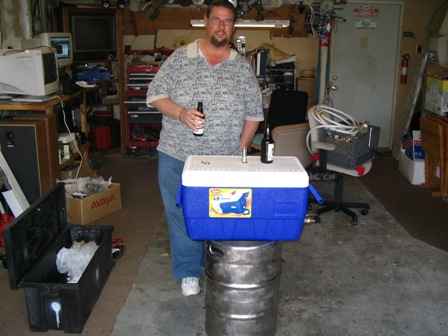
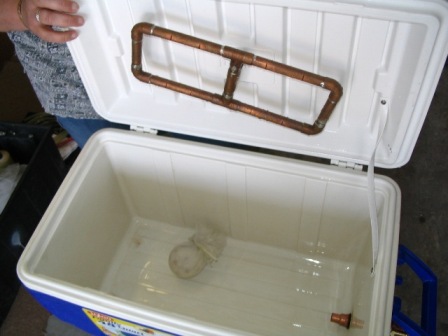
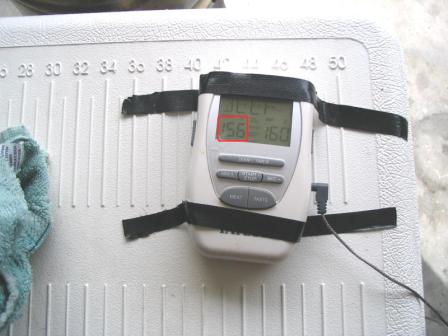
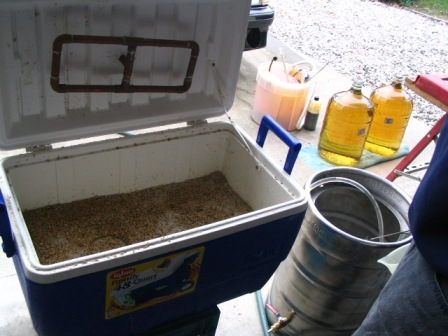
Many brewers and kits will tell you to steep them on your stove top in a pot of water at 152 degrees for an hour. Personally, I am way too lazy to be bothered to keep an eye on a pot of water to such a precise degree. We are going to cheat and use a small drink cooler to do the work for us.
Start by cleaning the cooler out and rinsing very carefully to remove any soap residue. Once that’s done, fill it with the hottest tap water you have on hand. Fill it to the very brim, drop the lid and let it sit for 10 minutes


Meanwhile, have a pot of water on the stove set to boil.

Turn off the heat and empty your cooler, open your bag or bags of grain and place them into the cheesecloth bag. Pick up any stray grains and put them into the bag.

You should have something like this.

Close the lid on the cooler and crack a cold one. You are making beer.
Once you have rested from your exertions, you should start getting your kettle ready. Using the biggest pot you have, fill it with 5 gallons of the freshest, best quality water you can get. I am blessed with excellent tap water. Not everyone is. If you do have nasty tap water, I highly recommend spring water purchased on sale at any grocery store for a few dollars. The quality of your beer is directly tied to the quality of your water. Don’t be cheap.

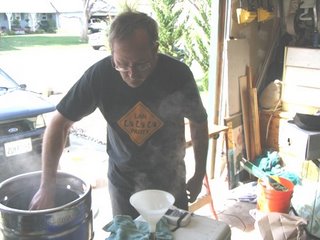
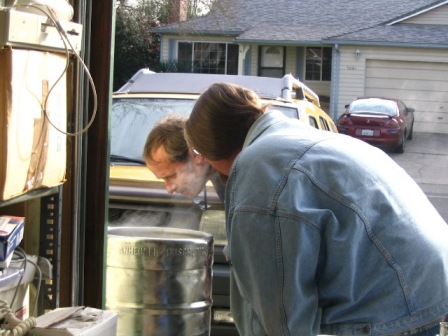
I am making a double batch and am using huge 15 ½ gallon converted kegs. Boiling 11 gallons is a snap. If however, you are using a smaller pot and are unable to do a full 5 gallon boil, don’t worry, you will still make a fine brew. All the instructions will remain the same but for an additional step I will remind you of later on. If you are using a 3 ½ or 4 gallon pot just do the same thing as I am now. The Turkey Fryer setup I am using for heat can often be borrowed from a friend or relative if you don’t have one, otherwise a stovetop and a 3 ½ gallon pot may be better suited for your first brew.

A helpful hint; Put your liquid extract in a pot of very hot water and keep it next to the stove or burner you are using to heat your boil water. It will soften it up nicely and will make adding it to your boil later much easier later on.
Keep an eye on your pot of water and stop it before it starts to boil. Ideally, it will be 170 degrees or so. Determining how long your stove will heat your water may be helpful to know ahead of time.
After an hour has gone by, your steeped grains have given their all. By steeping in the hot water, starches have been converted to sugars and flavors have been released that we are going to use to make a tasty brew.

The color change in this case was quite dramatic.
The temperature in our pre-heated cooler has fallen by less than 3 degrees. Since we have spent our time drinking beer and not watching a pot of water, we are rested and ready to start adding our ingredients together.
Grab the end of the grain filled bag, carefully dip it in and out of your hot pot of water. Rinse it like a giant tea bag until it runs clear. .

These grains have given their all, they can be composted, fed to animals or birds or simply discarded
The bag or bags of malt extract you had warming in the pot are completely liquid by now, be sure the heat to your pot is off and slice a generous corner off of the bag of extract and let it flow into the pot, let it run out and as it gets to the end, gently twist and squeeze it as needed to get all of the malty goodness into your pot.

Success.
Pour the mash water from the cooler into the pot and using your longest spoon, stir for several minutes to completely incorporate the honey like extract. Failure to do so will almost always lead to scorched spots in the pot and accompanying scorched flavors. Once you are sure you have completely incorporated all the liquids, put the lid on the pot and fire up the heat to nuclear. Stir occasionally in a clockwise direction, unless you are one of my readers from Down Under, to avoid hot spots and to speed up boiling.

As the liquor gets close to boiling; it will create a fine layer of bubbles, from this point on, watch the pot like a hawk. Failure to reduce the heat immediately after the start of boiling will result in the horror that is a boil over. Due to the huge amount of sugars we have in our pot, the resulting syrupy mess is enough to ruin a stove. Be prepared, come with weapons.
In the fight against boil over, the lowly spray bottle is your friend

Fill it with water and have it in hand while watching the pot. Reduce heat and spray at the first sign of a boil over and it will knock it down as easy as a Don King fighter.
Hopping in.

As we discussed earlier, hops are the spice of beer. The boiling liquid you have just created (called wort) is very sweet. Go ahead and ladle out a coffee cup full and taste it. Simply adding yeast will, at this point, create beer as most of the world knew it until the practice of adding hops to counter balance the sweetness was widespread. I believe however, you would be very disappointed in such a brew so we will add hops to make the beer we all know and love.
Your kit probably came with 2 separate kinds of hops. They are called boiling hops and aroma hops. The boiling hops are meant to counteract the cloying sweetness of the wort while the aroma hops give beer the familiar “beer smell” we most often associate with beer.
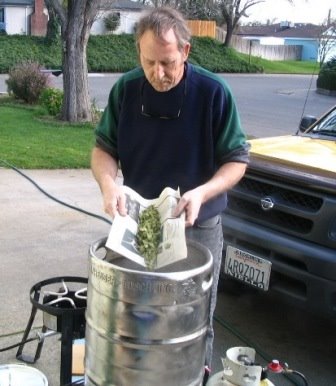
Turn down the heat and toss in your boiling hops. Once you are sure you are not going to boil over, crank the heat back up to maintain a roiling boil.
Helpful hints
One problem new brewers have is remembering when to do certain steps. A big help in aiding a quality and stress free brew session is making a timeline. A typical recipe will call for the addition of hops, kettle sugars, clarifiers, adjuncts or other items. Do yourself a favor and starting from the beginning of the boil, write down the timeline for when you need to add the various pieces of your recipe.

In this example, the timeline for my 80 minute boil went like this.
- 10:30-Boil started
- 10:40-Boiling hops and kettle sugars added
- 11:40-Clarifiers and aroma hops added
- 11:50-End boil
Most recipes have their own hopping schedule. Yours will undoubtedly be different than mine. Some have several types of hops which need to be added at different steps. Such as right after the boil, 15 minutes before end of boil, at the end of boil and even adding additional hops in the fermented beer. Writing them all down ahead of time greatly reduces the chances of forgetting a step. I firmly believe this simple step has saved me a great deal of trouble over the years.
Crossing the Sanitary Line
Cleanliness is next to Drunkenness.
Up till now, you have been working with boiling liquids so sanitation has not been a big concern. Heck, I have had leaves, bugs and other things fall into my boiling wort with no ill effects whatsoever. From this point on however, everything that touches your brew needs to be sanitized. You have several options including Bleach, Acid, Oxygen or Iodine based. I prefer Iodine so that’s what we shall use here.

It can be purchased in several sizes and is relatively inexpensive. Us it liberally and if there is any question of contamination.
Follow the label directions for use.

I like to make a tub of sanitizer and keep all of my working tools in it when brewing.
Cooling down your brew
Now that we have boiled our beer and added our hops, we need to cool it down as quickly as possible. If you have more money than time, you can buy a immersion chiller. Basically a coil of copper tubing that cold water runs through that will chill a 5 gallon pot of boiling liquid down to a comfortable 75 degrees in as little as 20 minutes.

If however, you don’t have access to a chiller, you can always do it the old fashioned way and use ice and water.
Using an able assistant and being very VERY VERY careful, you can move the pot into a bathtub, sink or other large vessel that will contain your pot and circulate cold water and ice to cool down your wort. Be sure to have some water already in the vessel before placing the pot inside. It make take hours to get it down to 75 degrees so don’t rush it. Keep the lid on the pot at all times to prevent contamination. Using a sanitized spoon, you can help the process along by giving it a non-vigorous stir occasionally. Overly agitating the cooling wort should be avoided at all costs. Once the temperature has dropped to 76 degrees you can move on to the next step.
Place the cooled pot on a countertop and give it a vigorous stir (with a sterilized spoon) in the clockwise direction, to make a whirlpool effect. It will then need to rest for 20 minutes, use the time to prepare for the next steps.
- Proof your Yeast (if using dry yeast)
- Sanitize your fermenter
- Prepare your airlock
- Clear a space for your fermenter.
Pitching the yeast
Our kit came with
I poured a cup of the cooled wort to a sanitized container and added the packet of yeast. Like making bread, we are going to proof our yeast, allowing it to bloom before adding it to the whole batch.

The one on the left was just poured while the one on the right had been sitting for 15 minutes.
You are now ready to transfer the cooled wort into your fermenter. You will be using either a carboy or fermenting pail. I have a preference for glass, and own several 6 ½ gallon carboys used only for fermenting. However, pails work very well, are easier to carry and are nearly unbreakable. The built in valve is a Godsend. Since I have only glass, we will use them in this example.

Getting the cooled wort into your fermenter is an easy choice if you have a pail. Toss in the yeast into your sanitized Fermenter and using a sanitized measuring cup, the larger the better, dribble the cooled wort into it making as many bubbles and foam as you can while still maintaining a reasonable flow. This is the only step in the process when agitating the beer is a good thing.

Avoid transferring the nasty goop in the bottom of the pot into your pail. Put the lid on and you are ready for the next step.
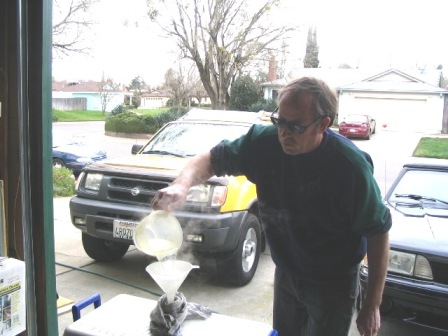
Those using glass will need to siphon or funnel the cooled wort from the pot into the carboy, again, try to use the stream to produce as many bubbles and foam as you can. If using a siphon, pour in the yeast, start the stream and sit back and watch. It will take at least 10 minutes.

And you thought I forgot.
When we were discussing the size of pot you need to make your batch, I mentioned that if you were unable to do a 5 gallon boil, you should do as big a boil as you possibly could and I would tell you what to do later. This is that time.
Add spring water, available at any grocery store, until your fermenter is at 5 gallons or 80% of your total fermenter volume if it is under 6 ½ gallons. Most brew pails are a full 6 ½ gallons so you should have plenty of headroom if you choose to go that route. You can go slightly over 5 gallons of you are feeling adventurous and greedy.
Plugging the hole.
You have several options for sealing up your beer from the elements while still allowing Co2 to escape. And trust me; a


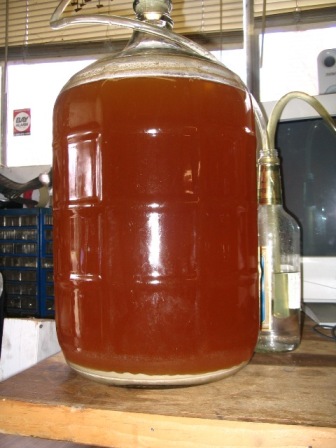
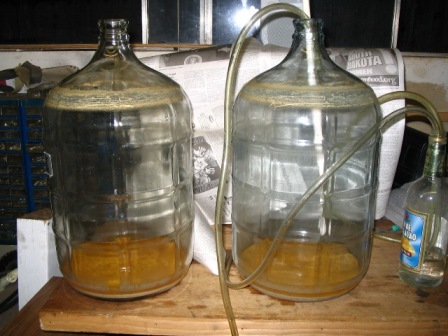
Either of these airlocks will work well for your beer. Pouring in a small amount of cheap Vodka or Sanitizer will create a one-way valve allowing gas out and not allowing bacteria and other nasties in.

Personally, I just use rubber bungs, a piece of hose and a section of pipe and call it good. The bottle has sanitizer or cheap vodka in it. Be sure your bungs have a big enough hole to accommodate your hose. Use the biggest hose you can get away with.
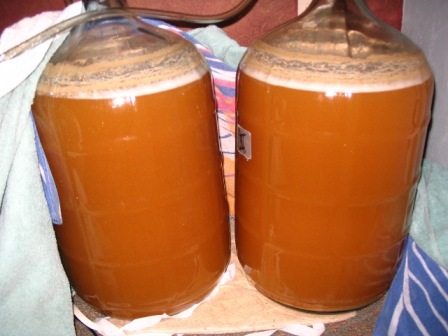
Once your airlock is in place, place your fermenter in a cool dark place (between 68 and 72 degrees with the yeast in our kit, yours may differ). When in doubt, I find an unused tub in a spare bathroom to be ideal in case of “accidents” as well as an ideal, stable temperature. Protect your brew from light with towels or a blanket and go get some serious couch time after your hour of backbreaking labor. I strongly suggest drinking several beers in sacrifice to the Yeast Gods.
Patience
You have done all you can to produce a great beer. It is all in Mother Natures hands now. There is nothing to be done except keeping an eye on it occasionally to ensure it does not blow out your airlock and produce a nasty mess. You should get airlock activity within 24 hours and have vigorous activity for a week or so. A layer of crusty looking goop will cover the surface of your fermenter.

Don’t worry and have a beer, the yeast is doing its job.
There is nothing to be done,
Don’t screw with it, don’t mess with it, don’t open it. When airlock activity slows to one bubble per minute or so, it is decision time.
Secondary or not?
Most brew books will tell you that at this point, it is time to transfer your beer to another carboy or bucket to finish clearing the beer. Since you are just starting out, I believe it is a step we can do away with and still produce a quality brew.
As you gain experience and equipment, seriously consider adding another carboy or bucket to your inventory but for now, we will just let the beer rest for another week or more. There is no cut and dried time you need to leave your brew, it is ready when it is ready.
So is it Ready?
After 2 weeks, take a look at the brew. Virtually all airlock activity should have ended. Shine a flashlight through the side of your fermenter and peek into the hole your airlock is in or peer through your carboy and take a look. Has the “head” of yeast fallen away? Is the beer clear looking? Really clear looking? If it is still a little cloudy or you still see a solid layer of gunk floating on top, put the airlock back in and cover it back up. Depending on temperature, recipe, yeast and numerous other conditions, it may take up to 3 or 4 weeks for your beer to completely clear. Take your time.

If it is clean and clear, its time to bottle.
Put a cap on it.
By now, you should have on hand at least 2 ½ cases of clean 12 oz. bottles or the equivalent. I have never had good results using twist off bottles. As fate would have it, most good beer comes in non-twist off tops so it is a good excuse to spoil yourself. Rinse your bottles in hot water as you empty them until they are clean. Try to get brown bottles whenever possible. Be aware that if you have a full 5 gallons in the fermenter, it may go as many as 3 cases.
As an alternative, many brewers like to use flip top bottles. The need for a capper is eliminated and the cool factor is way up there.

The “pop” sound the bottle makes when it opens is nice too.
Start by gathering your equipment and supplies and get some sanitizer ready. You are going to need a racking cane if you using a carboy but will need only a piece of hose if you use a bucket.
But first, always remember;
Cleanliness is next to Drunkenness
Sanitize everything that will come in physical contact with the beer.
Tools of the trade
To bottle, all you need are clean empty bottles, caps and a capper. Cappers can be found at any brew store or online for about 15 bucks along with the caps you will need. Always buy more caps than you need.


Throw the caps into some sanitizer and start filling bottles with it as well. Contact time is 2 minutes minimum for Iodine based methods so be prepared. Always inspect your bottles before filling them with sanitizer. Put aside any that are not squeaky clean. If you are using a bucket, hook up your sanitized hose to the valve in the bottom, pour the sanitizer out of the bottle, insert the hose and turn the handle. Fill each bottle until it is 1 ½ inches from the top.
Sweeting the deal.
There was one last ingredient in our kit we have yet to use. The priming sugar. Rather than mess with mixing the sugar, adding it to the bottles or using an additional pot or bucket for bottling, I suggest you use Carbonation Drops.

Carbonation Drops are available from your supplier. They are inexpensive, easy to measure and darn near fool proof. Spend the 4 bucks, it is less trouble than sugar and actually brings a little additional flavor to the party. Follow the manufacturers instructions for use. In our case it was 4 drops per bottle
Cap your bottles and store in the same cool dark place you used to ferment your beer. Practice on a few empties until you get the hang of it.
Did I mention patience?
Don’t even bother tying a beer before 2 weeks have passed. It just isn’t worth it. Even better, wait for 3, you will be rewarded with a much better brew. Throw a few into the fridge and prepare to taste your first brew.
Pouring your brew.
Rather than go on with a long winded explanation on how to pour a brew, I have prepared this handy graphic for you that explains the process.

I often print them and attach them to the bottle when I give beer away to friends.
Letting your beer age to its potential is going to be difficult, but if you are patient, you will be flat out amazed how good your beer turns out. Unlike Wine, Beer is best served fresh. Beer will peak in flavor and quality between the ages of 6 weeks to 4 months. I sincerely doubt however, that you will ever have any of your first brew still around at 4 months, it will be long gone. Take a piece of advise from an long time brewer, start another batch as soon as your fermenter is empty and you will be rewarded with a seemingly endless stream of top quality craft brewed excellence.
I hope that you will be inspired to perfect your technique and refine your methods to produce better and better beers. This guide is meant as an introduction only and I would again refer you to Palmers excellent on line guide at http://www.howtobrew.com/intro.html for an in-depth guide and reference. I do hope however that I have shown you that far from being overly complicated and expensive, you can, with a minimal investment, produce top quality beer at a fraction of the price of the cheapest swill available from your local mega-mart. Your circle of friends will suddenly expand and your waistline may grow, but through it all, you will have a secret smile, knowing your time and effort made it all possible.
I would like to thank my editors; Tom the Engineer, Decal, Concentric Circles, Doodad, Chris the number cruncher, IronKros and the many others who took the time to send suggestions and feedback.
As always.
Cheers,
knewshound
Labels: knews
posted by knews hound at 8:24 PM
1 comments